Prerequisites
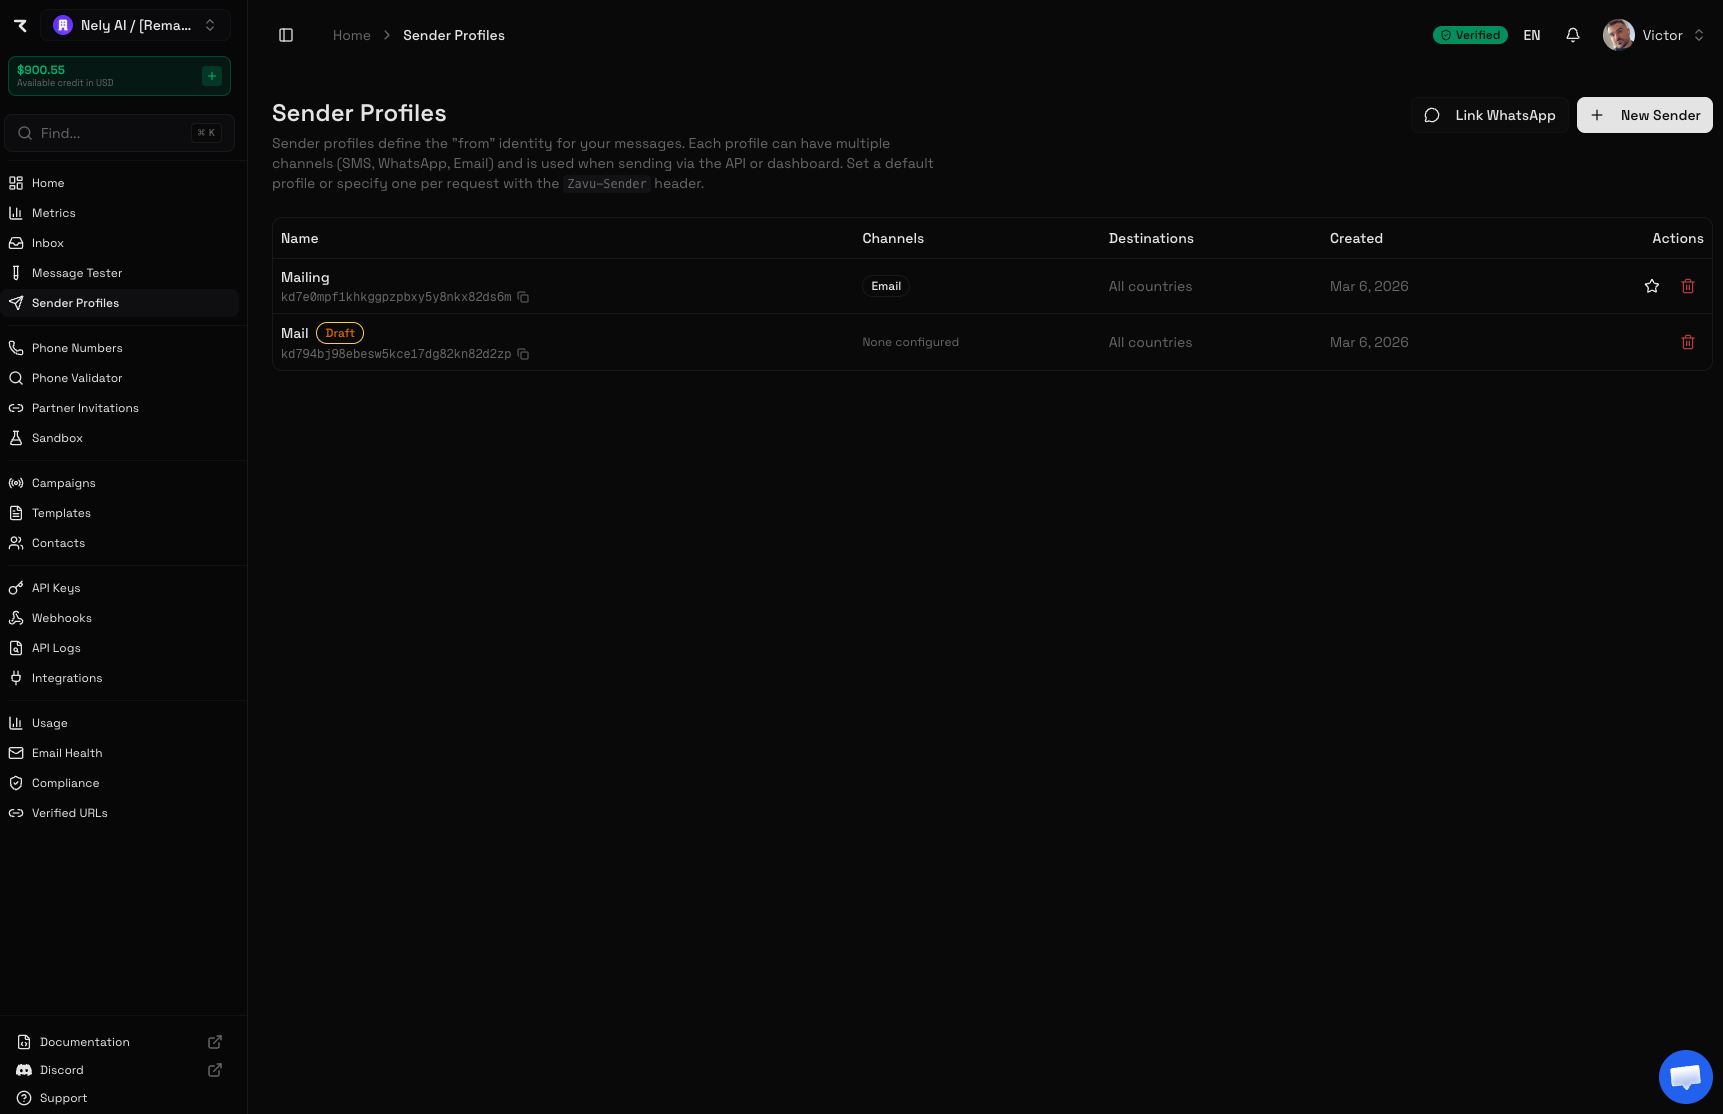
Before setting up email, you need a sender profile. If you don’t have one yet:- Go to Sender Profiles in the dashboard
- Click New Sender and give it a name
- Once created, click on the sender to open its settings
Sandbox Email (Quick Start)
Sandbox domains let you test email sending immediately without configuring DNS records.Sandbox emails are limited to 100 emails/hour. No KYC required. Use a custom domain for production.
1
Open your sender profile
Go to Sender Profiles and click on the sender you want to configure.
2
Go to the Channels tab
Click the Channels tab in the sender detail page.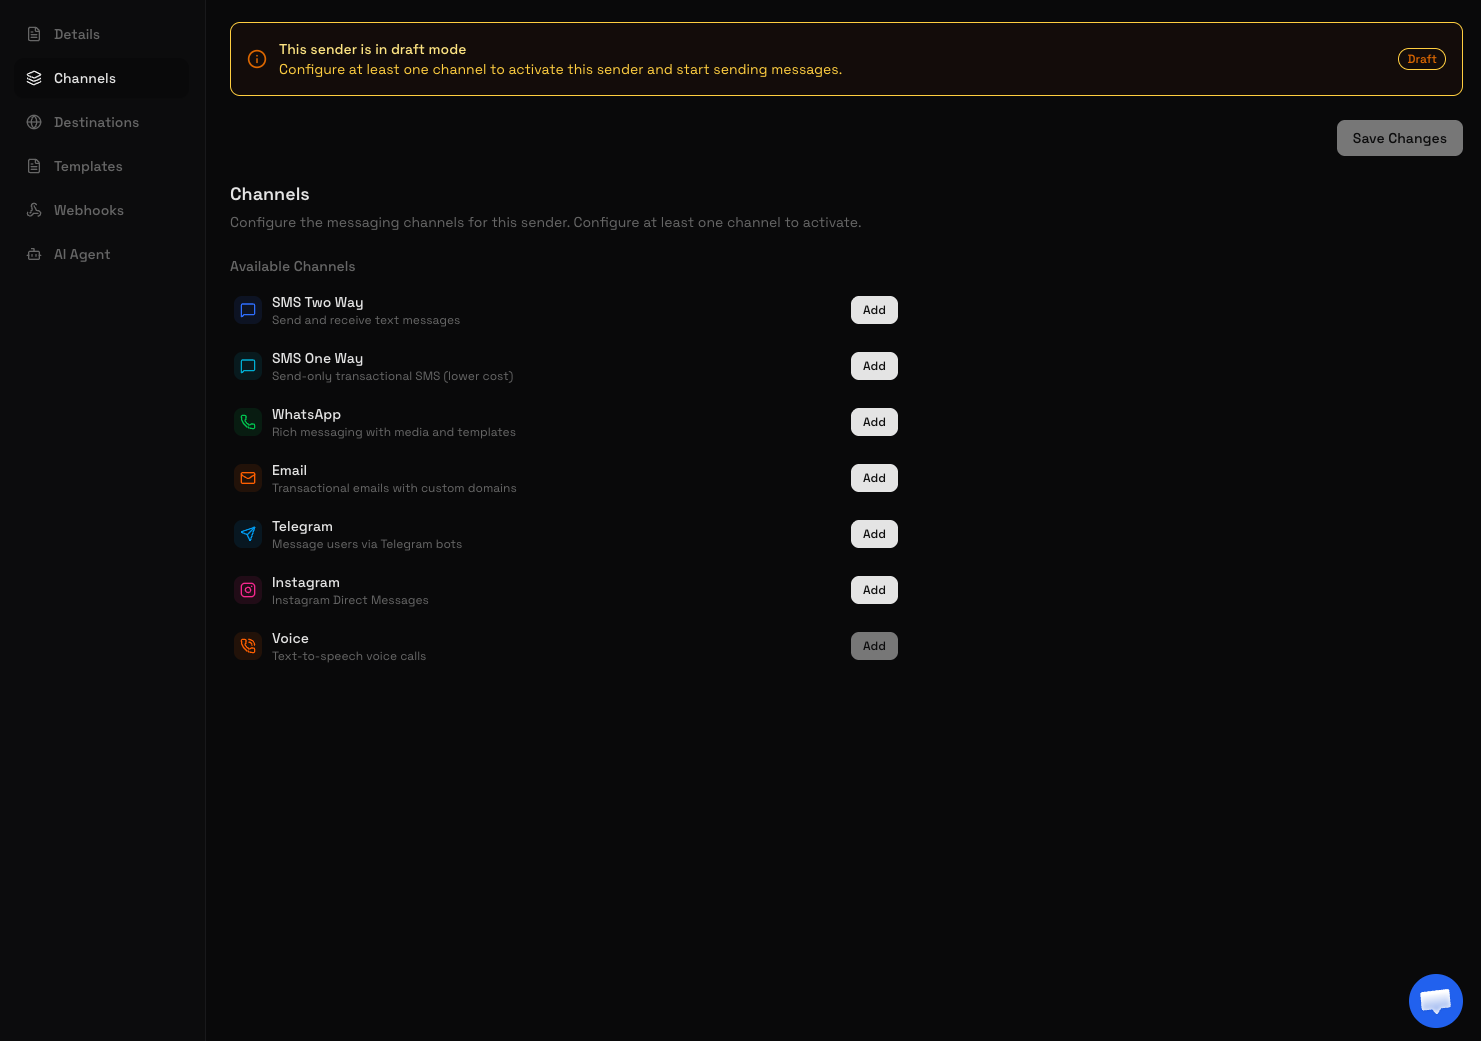
3
Add Email channel and activate Sandbox
Click the Email channel card to open the email configuration dialog. The dialog opens on the Sandbox (Free) tab by default. Click Activate Sandbox Email to create your sandbox domain.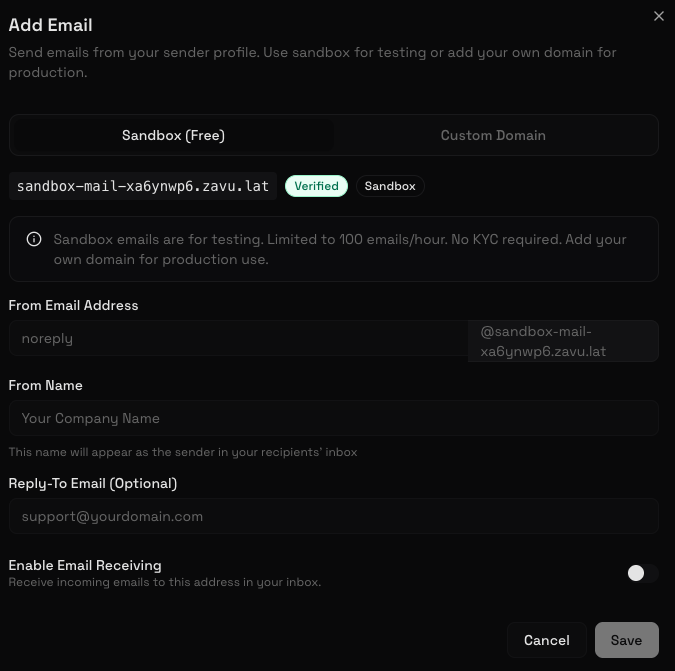
4
Configure your from address
Once the sandbox domain is created, configure:
- From Email Address: The local part before
@(e.g.,noreply) - From Name: The display name recipients see (e.g.,
Your Company) - Reply-To Email (optional): Where replies go
- Enable Email Receiving: Toggle this on if you want to receive inbound emails on this address
5
Save
Click Save to enable the email channel on your sender.
Send a Test Email
Sandbox vs Custom Domain
Custom Domain Email
For production use, add your own domain to send from addresses likenoreply@yourcompany.com.
1
Open the Email channel dialog
Go to Sender Profiles > your sender > Channels tab > click the Email card.
2
Switch to Custom Domain tab
Click the Custom Domain tab at the top of the dialog.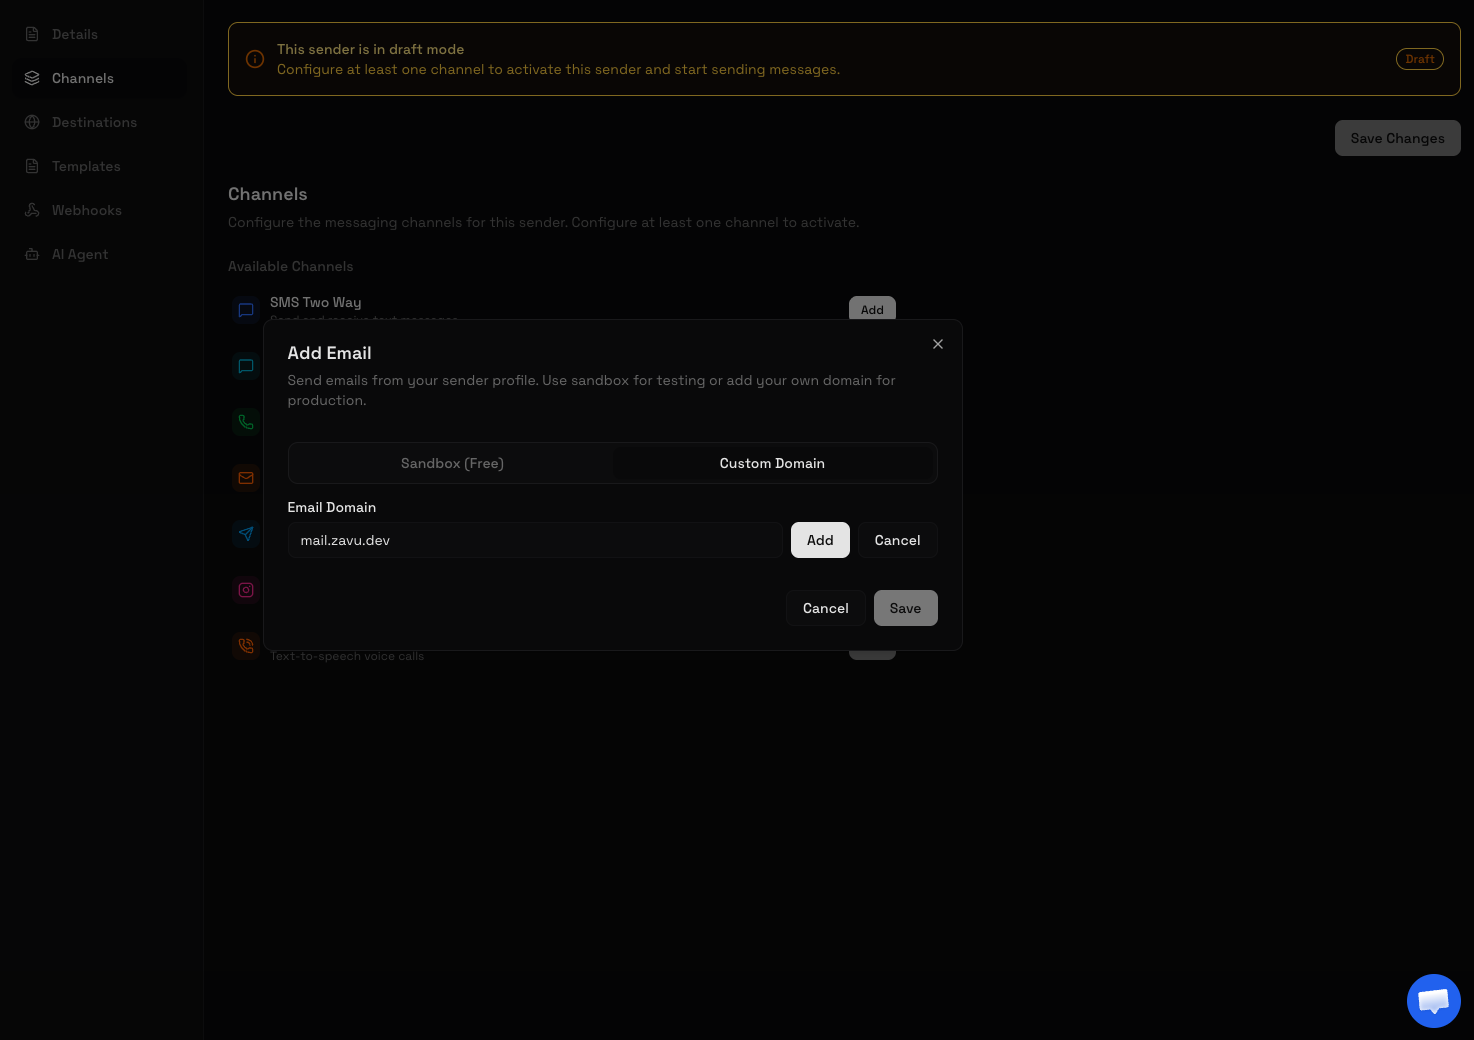
3
Add your domain
Select Add new domain from the dropdown and enter your domain (e.g., 
yourcompany.com).4
Configure DKIM records
Zavu displays the DKIM CNAME records you need to add to your DNS. Copy each record and add them to your DNS provider: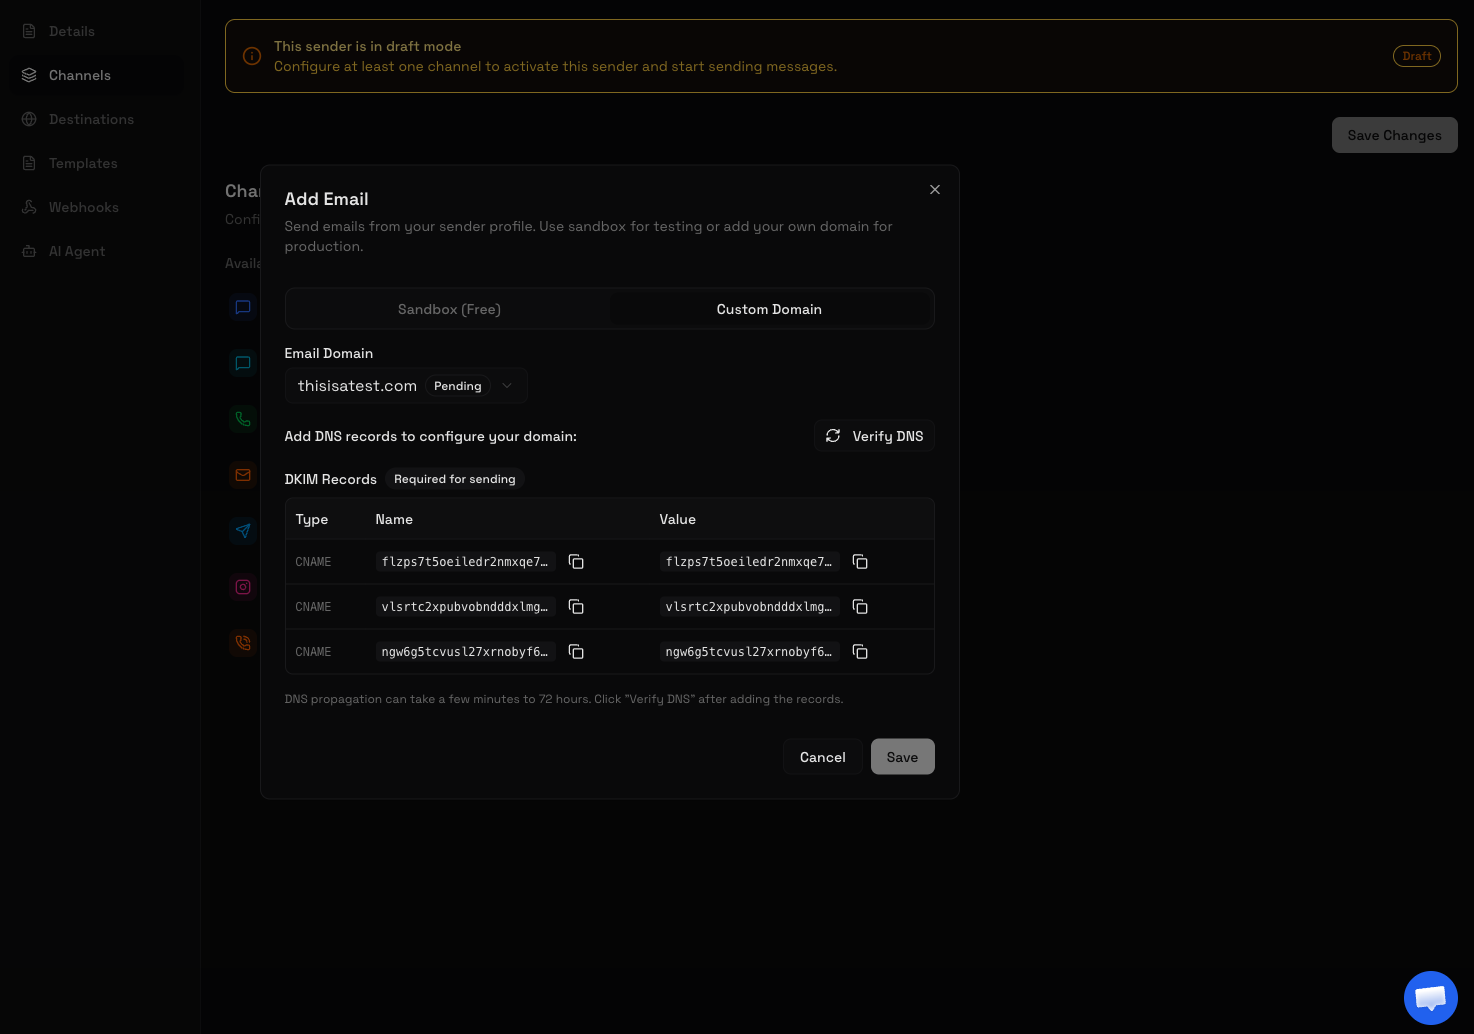
5
Verify DNS
Click Verify DNS to check if your records have propagated. Once verified, the domain status changes to Verified and the from address fields appear.
6
Configure from address
Set your:
- From Email Address: e.g.,
noreply - From Name: e.g.,
Your Company - Reply-To Email (optional): e.g.,
support@yourcompany.com
7
Save
Click Save to enable the email channel with your custom domain.
Create an email sender via the API
Once a domain is verified (dashboard or above), you can create an email sender programmatically — no phone number required. SetemailAddress to a from-address at your verified domain:
emailDomainId is optional — Zavu resolves it from the address. To attach an email address to an existing sender instead, PATCH /v1/senders/{senderId} with the same emailAddress field.
Then send from it — as the default sender, or by passing its ID in the Zavu-Sender header:
cURL
Passing
from in the send body does not create or select a sender — the from-address comes from the sender’s configured emailAddress. Create the email sender first (above), then it sends as the default or via Zavu-Sender.Receiving Emails
Zavu can receive inbound emails and deliver them to your application via webhooks. This works for both sandbox and custom domains.For Custom Domains: Add MX Record
1
Open the Email channel dialog
Go to your sender > Channels > Email card.
2
Find the MX record section
Under Enable Email Receiving, Zavu shows the MX record to add to your DNS:
3
Verify MX record
After adding the record, click Verify MX. Once verified, the toggle becomes available.
4
Enable receiving
Toggle Enable Email Receiving on and save.
For Sandbox Domains
Toggle Enable Email Receiving directly in the sandbox email configuration and save. No MX record needed.Set Up Webhook for Inbound Emails
To receive inbound emails in your application, configure a webhook on your sender:- Go to your sender > Webhooks tab
- Add your webhook URL and subscribe to the
message.inboundevent
message.inbound event:
Catch-all: receive every address at your domain
By default a sender only receives email sent to its exact address (e.g.support@yourcompany.com). Enable Catch-all to receive email addressed to any local part at the domain — sales@, billing@, hello@, or an address that doesn’t exist as its own sender — all delivered through this one sender’s webhook.
1
Enable receiving first
Catch-all builds on receiving, so Enable Email Receiving must be on (the domain’s MX record must be verified). See the steps above.
2
Toggle Catch-all
In the sender’s Channels > Email dialog, turn on Catch-all address and save. The toggle only appears once receiving is enabled.
message.inbound event. Route sub-addresses yourself using data.to, which is always the original recipient:
emailCatchAllEnabled on the sender:
cURL
Catch-all is per sender. Only one sender per domain should have it enabled — it owns all otherwise-unmatched addresses for that domain. Addresses that exactly match another sender still route to that sender.
emailCatchAllEnabled is ignored unless emailReceivingEnabled is also on.Testing Your Setup
Verify Sending
- Send a test email using the code examples above
- Check the message status in Messages in the dashboard
- Verify the email arrived in the recipient’s inbox
Verify Receiving
- Send an email to your configured address (e.g.,
support@yourcompany.com) - Check your webhook endpoint received the
message.inboundevent - Verify the inbound message appears in the dashboard under Messages
Common Issues
Next Steps
- Sending Emails - API reference for email messages
- Webhooks - Set up webhooks for delivery events
- Email Health - Monitor bounce rates and deliverability